
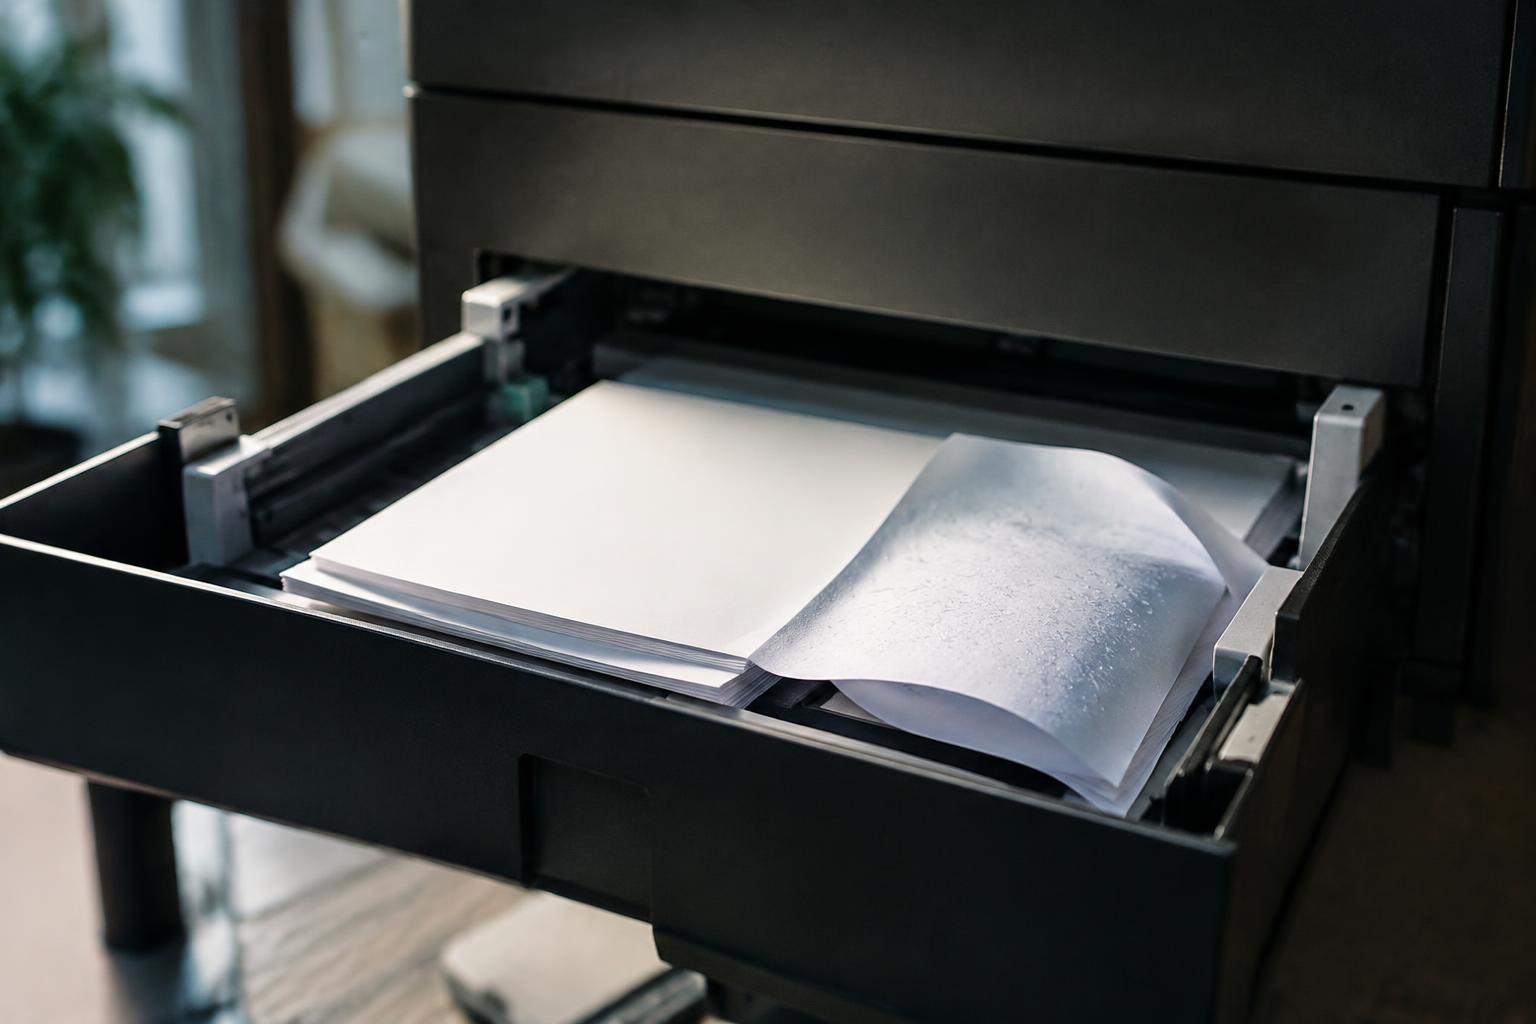
Paper jams often start before a sheet reaches the rollers: humid storage softens paper, curled edges snag, and an uneven stack feeds at an angle. Keep paper flat and dry, then load it squarely against the tray guides. Correct storage and loading reduce feed problems and protect the printer’s pickup rollers from repeated strain.
Key Takeaways:
- Store paper in its sealed ream until use, away from humid rooms, windows, and direct heat. Moisture can make sheets wavy or cause them to stick together, disrupting pickup from the tray.
- Fan the stack, discard sheets with pronounced curls or creases, and load paper with the correct side facing up as indicated by the tray markings. Set the guides snugly against the stack without bending its edges.
- Match the printer’s paper-size and media-type settings to the loaded stock, and keep the tray below its fill line. Incorrect settings, overfilled trays, and loose guides can all lead to skewed feeding or jams.
Identify the Factors Behind Paper Jams
Paper jams often trace to one of three distinct sources: moisture-related changes, physical damage to sheets, or errors in tray setup. Each affects the paper’s movement through the feed rollers in a different way, so the location and condition of a stuck sheet can offer useful clues. A printer’s display may also show a jam code even when paper is not visible; an Epson WF-3820 paper jam troubleshooting guide discusses that kind of alert.
Check how humidity affects paper
Humid air allows paper fibers to absorb moisture, changing sheet stiffness and making edges wavy or limp. In a printer, damp sheets can cling together, feed unevenly, or resist passing through the rollers, producing repeated misfeeds from the same tray. You may also see faint rippling across a stack that looks flat at first glance. Moisture-softened paper behaves differently from dry stock, particularly around the leading edge entering the feed mechanism.
Spot curled, damaged, or unsuitable sheets
Curled corners, bent edges, tears, and crushed areas can interrupt the paper’s path or catch against guides inside the printer. A sheet that has taken a set from tight storage may curve upward or downward, changing how it meets the pickup roller. Stock that is too thick, coated, or otherwise outside the printer’s supported media range can also feed poorly. Physical sheet defects are often visible at the stack’s edges or corners.
Recognize incorrect tray loading
Paper loaded above the tray’s fill line can press too firmly against the pickup mechanism, while a stack positioned loosely may shift during feeding. Guides set too wide let sheets skew; guides pressed tightly against the stack can pinch its edges. Mixed paper sizes or orientations also interfere with consistent pickup. Misaligned guides commonly leave pages entering at an angle, while the printer’s tray markings identify the required orientation and size.
- Check whether the jam message names a specific tray.
- Note whether the error repeats at the same point in a print job.
- Inspect the stuck sheet for roller marks or a torn edge.
How to Prevent Humidity-Related Jams
Paper absorbs moisture from the surrounding air, which can soften its fibers and make sheets feed unevenly through rollers. Keep the printer’s supply away from damp walls, open windows, and heat sources, and aim for a stable room environment rather than repeated shifts between humid and dry conditions. Consistent storage conditions preserve the paper’s intended stiffness and reduce the chance that moisture will interfere with feeding.
| Area | Recommended practice | Why it matters |
|---|---|---|
| Storage location | Choose a cool, dry interior space | Limits moisture exposure |
| Paper packaging | Keep reams sealed until needed | Reduces contact with humid air |
| Printer room | Maintain stable temperature and humidity | Limits changes in paper condition |
| New supplies | Let paper adjust to the room before use | Reduces abrupt moisture differences |
Store paper in a cool, dry place
Choose an interior cabinet or supply closet away from sinks, exterior doors, and direct sunlight. Keep reams off concrete floors, where dampness can transfer through the packaging, and avoid placing them beside radiators or printer exhaust vents. A stable, dry storage area protects paper from absorbing excess moisture or drying unevenly; a closed office cupboard is generally preferable to a basement shelf or a windowsill.
Keep paper sealed until use
Leave unopened reams in their moisture-resistant wrappers until you need to replenish the printer. After opening a pack, return unused sheets to the original packaging and close it securely, or place them in a clean, dry, airtight container. Open paper absorbs room moisture, especially in humid offices, so avoid leaving a partial stack exposed overnight beside the printer’s input tray.
Allow paper to acclimate before printing
When paper arrives from a delivery area, warehouse, or vehicle with different conditions from the printer room, keep the ream sealed while it adjusts to the room. Moving a cold or humid pack straight into use can expose sheets to a sudden temperature and moisture change. Acclimate sealed reams near the printer, away from vents and sunlight, before opening them for a print run.
Tips for Handling Curled or Damaged Paper
Paper condition affects how reliably each sheet passes through the pickup rollers and fuser. Before loading a ream, look for damage from storage, handling, or exposure to moisture, and separate sheets that no longer lie flat. Consistent sheet condition reduces uneven feeding and prevents curled edges from catching inside the printer. A quick inspection and careful storage are especially useful with lightweight stock, whose edges show bends more readily than heavier paper.
Inspect paper before loading
Check the stack under good light, looking for torn corners, folded edges, embedded debris, and sheets stuck together. Fan the paper gently to separate static-cling sheets, then tap the stack on a clean, level surface to expose uneven edges. Remove visibly damaged sheets rather than relying on the pickup rollers to feed them smoothly. Keep fingers clean and dry; oils or moisture transferred to the paper can affect feeding and print quality.
Replace curled, damp, or creased sheets
Set aside sheets with pronounced curl, damp patches, wrinkles, or sharp creases. These defects change how paper contacts the rollers, and a folded corner can catch along the paper path. Use flat, dry sheets from an intact ream instead of trying to flatten damaged paper by hand. If only a few sheets in a stack are affected, remove them before printing; discard paper that remains warped after drying at room temperature.
Keep paper flat between uses
Return unused sheets to their original packaging, close the inner wrapping, and store the ream horizontally on a clean shelf. Avoid placing heavy objects on an opened stack, since pressure can leave permanent bends or impressions. Protect paper from moisture by keeping it away from sinks, exterior doors, and unheated storage areas. For an open ream, use a rigid, flat cover to shield the top sheets from dust and accidental spills.
- Use paper marked for your printer’s supported media type.
- Keep paper away from direct sunlight and heat vents.
- Open packaging only when you are ready to use the paper.
How to Load Printer Paper Correctly
Correct loading keeps each sheet square as it enters the feed rollers, reducing skew, double feeds, and edge catches. Follow the tray markings for orientation, size, and capacity, since cassette and multipurpose trays can use different loading positions. Keep the stack flat and supported, with the side guides touching its edges without bending them. Accurate alignment matters even with a fresh ream, because a small mismatch at the tray can carry through every page in the print job.
Confirm the paper size and type
Before loading, match the paper to the selected tray and the print settings. Check the cassette’s size indicator and choose the corresponding setting, such as Letter or A4; mixed sizes in one stack can feed unevenly. Select the correct media type in the printer driver as well, particularly for cardstock or labels, which often require a designated feed path. Consistent size and type keep the printer’s feed settings aligned with the sheets in the tray.
Align the stack and adjust the paper guides
Place the stack on a flat surface and tap its edges until the sheets sit evenly, then set it into the tray in the orientation shown by the printer’s diagram. Slide the side and rear guides against the paper edges without squeezing the stack. Loose guides let sheets enter at an angle, while tight guides can bow them and interfere with pickup. Even edge alignment keeps the stack square beneath the guides.
Avoid overfilling the tray
Load paper only to the tray’s fill line, keeping the top of the stack below the marked limit. An overfilled tray puts excess pressure on the pickup mechanism and can cause sheets to drag, feed together, or catch at the entrance. If the tray has no visible line, use its capacity marking in the printer manual rather than forcing in an extra handful. Leave the stack below the limit so the tray cover and guides sit properly.
| Loading step | What to do | What to avoid |
|---|---|---|
| Confirm settings | Match tray size and media type to the job | Mixing sizes or selecting the wrong type |
| Align the stack | Square the edges and position guides gently | Loose guides or a bowed stack |
| Set tray capacity | Keep paper below the fill line | Forcing extra sheets into the tray |
Tips for Maintaining Reliable Paper Feeding
Steady feeding depends on the parts that grip each sheet and on settings that tell the printer what to expect. Build routine maintenance into your printing schedule, especially if the machine handles frequent jobs or sits unused for long periods. Keep the tray guides aligned with the paper stack, and avoid filling beyond the marked limit. These small checks reduce strain on the pickup path and keep sheets moving through the printer at a consistent pace.
Clean feed rollers as recommended
Paper dust and residue reduce roller traction, so follow your printer’s maintenance instructions for cleaning the pickup and feed rollers. Use a lint-free cloth, and apply only the cleaner or water specified by the manufacturer; excess moisture can leave the rollers slippery or damage nearby components. Power the printer off before accessing the feed path, and let cleaned rollers dry fully before printing. A roller that feels glazed or remains dirty after cleaning may need replacement.
Match printer settings to the loaded paper
Select the correct paper size and media type in the print dialog or printer driver before sending a job. A mismatch, such as choosing thick stock while feeding plain paper, can alter feed timing or cause the printer to use an unsuitable path. Use the tray’s actual paper setting for labels, envelopes, or heavier sheets, and confirm the selected source matches the tray you loaded. For duplex printing, use a media type approved for two-sided feeding.
Use paper that meets the printer’s specifications
Choose paper within the printer manual’s supported size, weight, and media range. Sheets that are too thick, too thin, or outside the listed dimensions can slip, skew, or fail to pass through the feed mechanism. Store paper flat in its sealed wrapper until use, and avoid mixing brands or weights in one stack. Keep specialty media within its rated limits, particularly labels and cardstock, which require compatible feed paths.
- Remove stray clips, staples, or adhesive scraps from the tray.
- Fan a fresh stack lightly before placing it in the tray.
- Keep the paper stack below the tray’s maximum fill mark.
How to Clear a Paper Jam and Prevent Recurrence
After a jam stops printing, clear the obstruction before restarting the job; forcing paper through the rollers can damage the feed mechanism. Follow the printer’s prompts and use its access panels to remove sheets safely, then inspect the path for scraps and identify what caused the stoppage. A careful removal and cause check reduces the chance of an immediate repeat, while keeping the printer powered down during hands-on clearing protects both you and the equipment.
| Stage | Action | Purpose |
|---|---|---|
| Open | Use the printer’s indicated panels | Reach the jam safely |
| Clear | Pull paper along the feed direction | Limit tearing and roller stress |
| Inspect | Check rollers and the full paper path | Find scraps or a recurring cause |
Follow the printer’s jam-removal instructions
Start with the control panel message or the manufacturer’s marked access points, since each model routes paper through different rollers and doors. Turn off the printer and disconnect power if the manual directs you to do so before reaching inside. Pull a visible sheet slowly in the direction of its normal travel, using both hands to keep it from tearing. Never tug against resistance, and avoid touching the fuser, which can remain hot after printing.
Remove torn scraps and check the paper path
Once the main sheet is out, inspect the tray, feed rollers, duplexer, and output area for small fragments that can trigger another jam. Use a flashlight to look into narrow channels, but do not insert knives, screwdrivers, or other sharp tools near rollers or sensors. Remove loose scraps with your fingers only where the manual permits, and verify that no paper remains caught around the pickup roller or sensor flags before closing each panel.
Identify and address the cause before printing again
Before restarting, check whether the jammed sheet was damp, curled, torn, or loaded above the tray’s fill line; also confirm the side guides sit snugly against the stack without bending it. Make sure the selected paper size and type match the tray contents, since a mismatch can feed sheets at the wrong setting. Replace damaged paper and reseat the stack squarely, then run a short test job to confirm smooth, single-sheet feeding.
Conclusion
Consistent paper handling is your best defense against jams caused by moisture, curled edges, or incorrect loading. Store reams in a dry, stable room, let paper acclimate before use, and replace sheets that are damp, bent, or torn. Before printing, align the stack, avoid filling the tray beyond its marked limit, and match the guides to the paper size. If a jam occurs, remove the sheet along its feed path and inspect the rollers before restarting the job.
FAQ
How can I reduce printer paper jams caused by humidity, curling, and incorrect paper loading?
Keep paper sealed in a cool, dry place, inspect it for damage, and load a neat stack with the guides adjusted to the paper size. If paper has absorbed moisture or developed curls or creases, replace it rather than relying on storage or alignment to correct it.
How long should printer paper acclimate before I use it?
Let paper adjust to the printer room before loading it, especially after it has been kept in a noticeably different temperature or humidity. The time needed depends on the difference in conditions, so keep the paper sealed while it acclimates and follow any guidance from its manufacturer.
Can I keep using paper that is slightly curled or damp?
It is safer to replace damp, creased, or noticeably curled sheets before printing. Minor curl may not always cause a jam, but paper condition and printer design affect feeding, so inspect the stack and use flat, dry paper that meets the printer’s specifications.
What should I check if my printer keeps jamming with new paper?
Check that the paper matches the printer’s size and type requirements, the stack is aligned, and the guides touch its edges without squeezing it. If loading is correct, follow the printer’s instructions to inspect the paper path and clean the feed rollers as recommended.
Is it safe to pull jammed paper out of a printer?
Yes, if you follow the printer’s jam-removal instructions and pull gently in the direction the paper normally travels. Avoid forcing paper or reaching near hot components, and check for torn scraps afterward; if paper remains stuck or the printer warns against user removal, consult its manual or service support.