
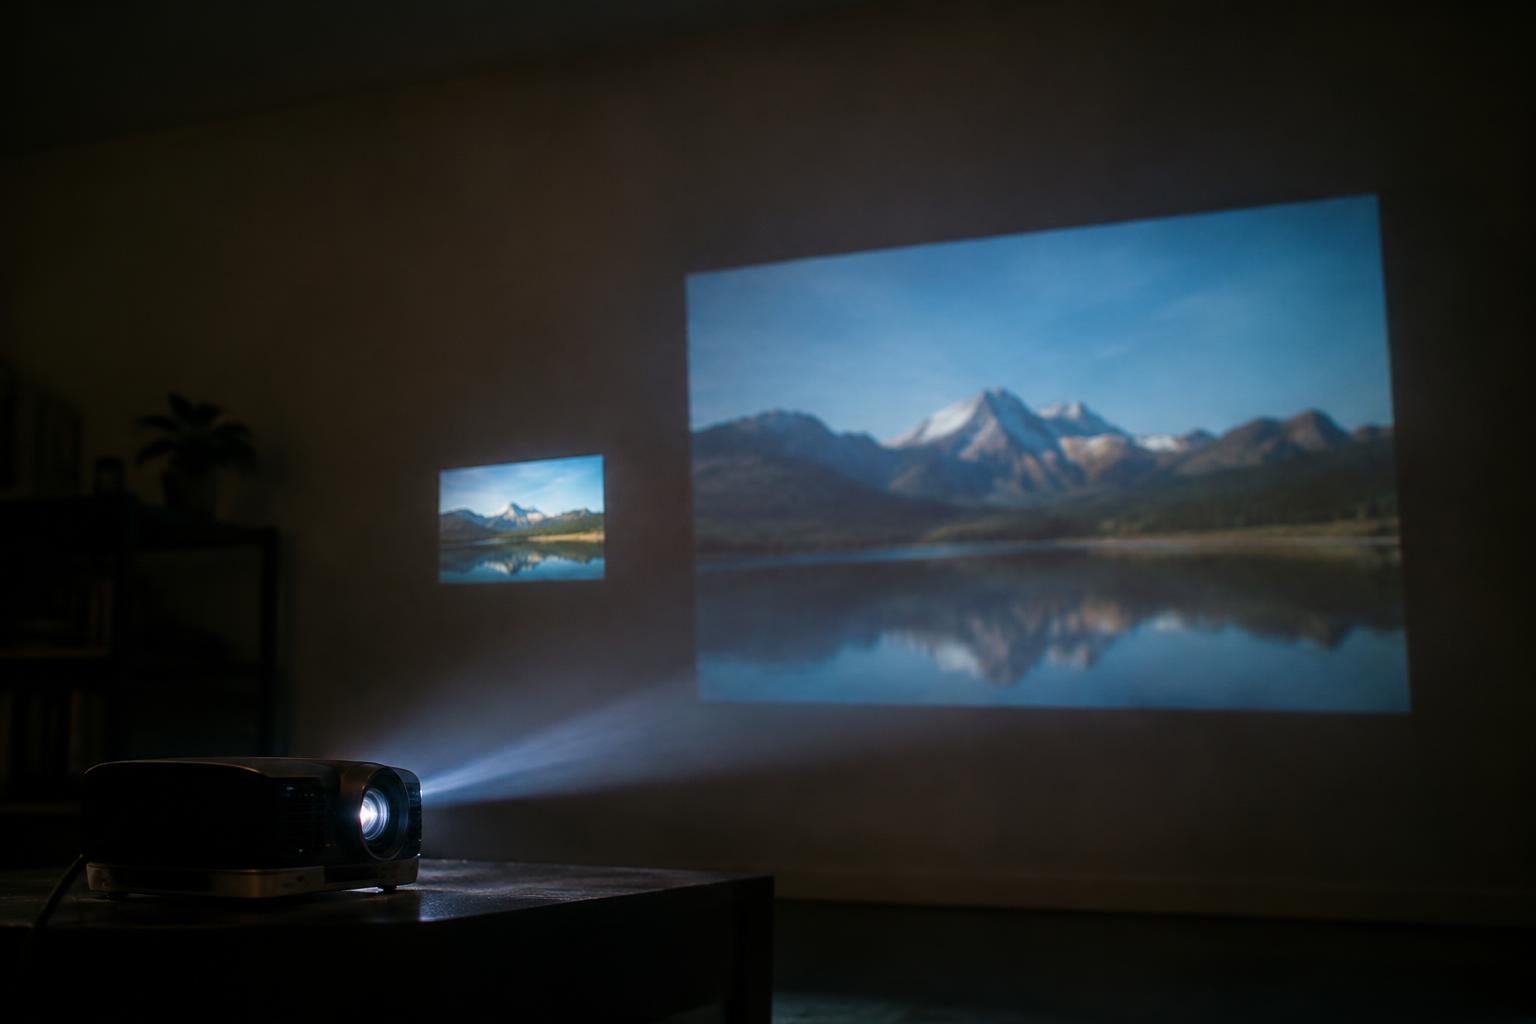
Expanding a projected image spreads the projector’s available light across a larger screen area, so each part of the picture appears less bright. If your image looks washed out on a wide wall, screen size and light output are closely connected; a small change in image width can make shadows, colors, and fine details noticeably harder to see.
Key Takeaways:
- A projector spreads its available light over the full image area, so enlarging the picture reduces brightness per unit of screen area.
- Throw distance and zoom-lens position affect image size and light output; a projector set to its widest zoom position often produces a dimmer image than at its telephoto position.
- High-gain screens, ambient light, and lamp or laser output all influence perceived brightness, so a large image in a bright room can look dim even when the projector is operating normally.
How Image Size Changes Brightness
Screen area determines how concentrated the projected light appears at each point on the image. As you enlarge the picture while keeping the projector in the same operating mode, its available light covers a broader surface, reducing brightness per unit of screen area. The change is especially visible on a matte white screen in a dark room, where lower light density makes bright scenes look less vivid and shadow detail harder to distinguish.
Light Distribution Across the Screen
At a fixed projector output, increasing the image’s width and height increases its total area, so the same beam is distributed across more screen. Doubling both dimensions creates four times the surface area, not twice the area, and the image’s illuminance falls accordingly. You see this most clearly in a large, uniformly lit white field, where brightness per square foot drops even though the projector continues to produce the same overall beam.
The Inverse Square Law and Viewing Distance
As you move farther from a projector, light spreads across a larger image, and illuminance decreases with the square of the distance when the beam geometry remains comparable. Doubling the throw distance can therefore spread the beam over roughly four times the area, producing about one quarter the illuminance. Real projectors use lenses to shape the beam, so zoom and throw geometry affect the exact result; the key comparison is the image area at each lens position.
- Projector placement fixes the lens-to-screen distance.
- Aspect ratio changes image area at a given width.
- Keystone correction reshapes the projected image.
Projector Brightness and Light Output
Your image’s brightness begins with the light the projector produces, measured in lumens. A higher lumen rating means greater total light output, but it does not describe image quality on its own. Lamp, laser, and LED models also differ in how they deliver light and maintain output over time. Treat the rating as a useful baseline, then account for the projector’s operating mode, since a quieter or energy-saving setting often reduces available light.
Lumens, ANSI Lumens, and Perceived Brightness
Manufacturers may list lumens using different testing methods, so ANSI lumens provide a more standardized basis for comparing many projectors. A broad, unqualified lumen claim may not match the brightness you see in ordinary use. Perceived brightness also depends on color performance: a projector that produces a bright white image may render colors less vivid at the same setting. For context on pale, low-contrast images, see Why Your Projector Looks Washed Out-and How to Fix It.
Projector Limitations and Brightness Settings
Even a high-output projector has a practical ceiling set by its light source and optical system. Eco mode typically dims the lamp or laser to reduce power use and fan noise, while a brighter preset increases output and may produce more heat or audible cooling. Aging lamps gradually lose light, and some models restrict full brightness to specific picture modes. Check the selected mode and lamp status before judging the projector’s rated output.
| Factor | Effect on light output | What to check |
|---|---|---|
| Rated lumens | Indicates stated total output | Whether the figure is ANSI lumens |
| Eco mode | Reduces output, power use, and fan noise | Current brightness preset |
| Picture mode | Can trade brightness for color accuracy | Mode used for the image |
| Lamp condition | Output declines as a lamp ages | Projector lamp-status indicator |
Screen Size, Throw Distance, and Lens Position
Projector placement determines how its light is distributed across the picture, so the same unit can produce different screen illumination in different setups. A centered lens sends the image along a more direct optical path, while an off-axis installation changes the path and may reduce uniformity near the edges. Geometry shapes brightness across the projected area, with the lens-to-screen alignment setting the image’s basic footprint.
Image Size and Throw Distance
As you enlarge an image, the projector’s fixed light output spreads across more screen area, lowering illumination per unit of surface. Throw distance determines the image size for a given lens setting: move the projector farther back, and the picture grows unless you adjust the lens. Greater image area means less light per area; a projector placed at the far end of a room typically produces a larger, less brightly illuminated picture than the same unit set closer.
Zoom, Lens Shift, and Optical Efficiency
Zoom position affects how efficiently the lens transmits light, and many projector lenses deliver more output near the wide-angle end than at maximum telephoto. Lens shift moves the image vertically or horizontally without tilting the projector, preserving the intended rectangular shape. Use lens shift for alignment when the mount is offset; keystone correction instead reshapes the image digitally and can reduce effective resolution, especially along the corrected edges.
- Measure the lens-to-screen distance, not the projector’s cabinet depth.
- Use the lens throw-ratio range to confirm a suitable mounting position.
- Keep the lens clear of obstructions such as a ceiling beam or shelf.
Room and Screen Factors
Room surfaces and viewing conditions shape how much of the projector’s light reaches your eyes, so the same image can appear different in two spaces. Ambient light and screen reflectance influence perceived brightness alongside image size. A pale wall, a dedicated screen, and a glossy surface each return light differently, while nearby windows and light-colored furnishings can add stray illumination to the viewing area.
Ambient Light and Viewing Conditions
Light entering through windows or coming from ceiling fixtures competes with projected detail, making dark scenes look washed out and reducing perceived contrast. Control light near the screen with curtains or blinds, and avoid lamps aimed at the viewing surface. Wall and ceiling colors matter too: pale surfaces can reflect projector light back into the room, while a dark viewing area limits that reflected glow.
Screen Gain, Color, and Surface Condition
Screen gain describes how strongly a surface reflects light toward viewers in a particular direction. A higher-gain screen can look brighter from its preferred viewing positions, but brightness may fall off when you sit off-axis. Screen color and texture also affect the image: gray material can deepen blacks, while stains, dust, wrinkles, or uneven paint scatter light and create visible dull patches.
| Room or screen factor | Effect on perceived image | Specific example |
|---|---|---|
| Ambient light | Washes out contrast and dark detail | Daylight through an uncovered window |
| Screen gain | Changes brightness by viewing angle | Off-axis seating looks dimmer |
| Screen color | Alters brightness and black appearance | Gray material deepens perceived blacks |
| Surface condition | Scatters or unevenly reflects projected light | Dust or wrinkles create dull areas |
Diagnosing and Improving a Dim Image
Start with adjustments that address the projector’s current condition and setup before changing your viewing surface. Work through one variable at a time, then observe the image from your usual seat so you can distinguish a real improvement from a change in color or contrast. Clean optics and ventilation matter: dust on the lens or clogged air intake can reduce perceived clarity, while restricted airflow can trigger thermal limits. Record the original picture settings before making changes.
Checking Brightness Mode, Lamp, and Filters
Open the picture menu and select the projector’s brighter output mode, often labeled Bright, Dynamic, or High Brightness; colors may look less accurate in this setting. For a lamp-based model, inspect the lamp-hour counter and replace a lamp that has reached its rated service life, following the manufacturer’s instructions. Power off and unplug the unit before cleaning a removable air filter, and avoid touching the lamp glass. A clogged filter can restrict cooling and cause light output to fall.
Reducing Image Size or Controlling Room Light
Reduce the projected image by moving the projector closer, using optical zoom if available, or masking part of the image with a properly sized screen. A smaller image concentrates the available light over less area. In a room with windows, close blinds or curtains and switch off nearby lamps; light falling on the screen washes out dark tones and lowers perceived contrast. Block direct light first, especially from windows opposite the screen, before judging the image.
Adjusting Screen Placement and Projector Settings
Place the projector within its specified throw-distance range and keep the lens aligned with the screen’s centerline. Excessive keystone correction digitally reshapes the picture and can reduce usable image detail, so adjust physical placement before relying on keystone controls. Set the lens shift, focus, and zoom carefully, then disable power-saving modes if they limit light output. Use optical alignment rather than digital correction where possible, and confirm focus at the screen edges as well as the center.
- Clean fingerprints from the lens with a microfiber cloth made for optics.
- Keep vents clear of curtains, shelves, and nearby walls.
- Use the projector’s test pattern to inspect focus and geometry.
Choosing a Projector for a Large Image
Start with the screen you plan to fill and the room where you will watch: both determine how much light must reach each square of the image. A projector that looks bright on a modest screen can seem subdued when enlarged, particularly with ambient light on a pale wall. Match the model’s output to your screen’s gain, viewing distance, and room lighting, then assess the result at your intended image size rather than relying on a showroom demonstration.
Brightness Specifications and Screen Requirements
Check the projector’s rated ANSI or ISO lumens, then compare that figure with the screen’s diagonal, aspect ratio, and gain. A larger image spreads the same light across more area, so a big screen in a room with windows demands more output than a smaller screen in a darkened space. Treat usable brightness as more relevant than a headline rating, since picture modes, color accuracy settings, and lamp age affect delivered light. A matte white screen typically has a gain near 1.0.
Balancing Image Size, Resolution, and Budget
Choose the image dimensions and seating distance together, because resolution becomes more noticeable as viewers sit closer to a large screen. A 4K projector preserves finer detail at that scale, while a 1080p model can suit a more distant viewing position at a lower purchase cost. Set a budget that includes the screen and any needed light control, not just the projector. For a living room with daylight, prioritizing higher light output may matter more than upgrading resolution.
| Viewing condition | Screen choice | Projector priority |
|---|---|---|
| Dark room, moderate screen | Matte white, gain near 1.0 | Accurate picture modes |
| Large image, controlled light | Screen sized for seating distance | Higher usable lumen output |
| Daylit living room | Screen suited to ambient light | Brightness and light control |
| Close seating, large image | Screen matched to viewing distance | Higher resolution |
Summing up
A projector looks dimmer across a large image because its light spreads over a greater screen area, reducing brightness per unit of surface. Your result also depends on the projector’s light output, zoom position, screen gain, and room lighting. To restore a clear picture, reduce the image size, move the projector closer if the setup permits, or use a brighter model rated for your intended screen dimensions. For a large installation, match the projector’s lumen output to the screen and viewing conditions.
FAQ
Why does a projector look dimmer when displaying a large image?
A projector looks dimmer on a large image because the same light output is spread across a greater screen area. The effect is stronger in a bright room or on a screen with low gain, and reducing the image size or controlling ambient light can make it appear brighter.
Will a brighter projector fix a dim picture on a large screen?
A projector with higher light output can help make a large image brighter, but it may not solve every cause of a dim picture. Check the brightness mode, lamp or light source, and filters first, since settings or maintenance issues can limit the output of an otherwise suitable projector.
How can I make my projector image brighter without buying a new projector?
You can often improve brightness by reducing the image size, using a brighter picture mode, cleaning or replacing a clogged filter, and limiting room light. The best adjustment depends on what is causing the dimness, so check the projector’s settings and condition before changing its placement.
Does moving a projector farther from the screen make the image dimmer?
Moving a projector farther away can make the image dimmer if it increases the projected image size, because the light is spread over more area. The result depends on the lens and zoom setting, so compare image brightness at the same size and with the same picture mode.
Is it worth buying a more powerful projector for a large screen?
A more powerful projector can be worth buying if the current model cannot provide enough brightness for the screen size and viewing conditions. Compare usable light output and the screen’s gain, and account for ambient light, since a high lumen rating alone does not guarantee a bright-looking image.