
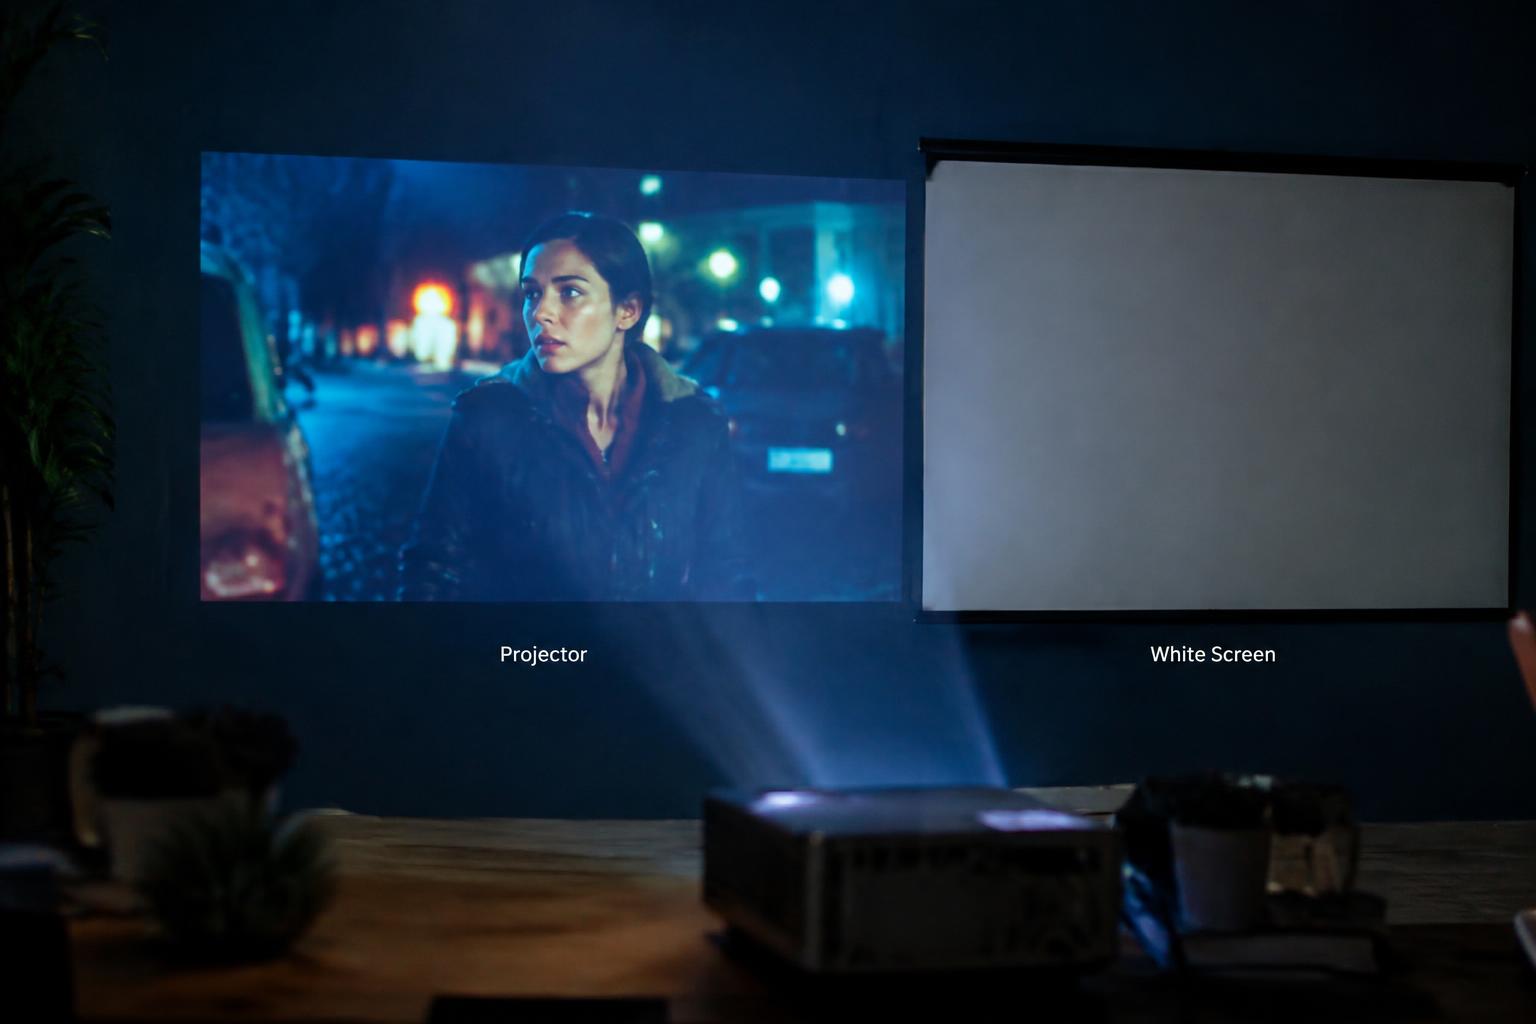
A colored wall can serve as a projector surface, but its paint alters the light reaching your eyes. Dark or saturated shades typically make images look dimmer, while warm hues can shift whites and skin tones. A smooth, neutral wall gives you the most predictable color; a glossy finish can add distracting reflections.
Key Takeaways:
- A projector works on a colored wall, but the wall’s hue and finish change the image. Dark or saturated paint absorbs more light, while glossy paint can create distracting reflections.
- Expect color shifts and reduced contrast, especially in bright scenes and shadow detail. A neutral gray or beige wall usually changes colors less than a strongly tinted one.
- For a modest improvement, use a matte surface and adjust the projector’s brightness, color temperature, and picture mode. A projection screen provides a more consistent image than most painted walls.
How Colored Walls Affect Projected Images
Your wall acts as part of the projection surface, so its color influences the light returning to your eyes before image detail can be judged. A white wall reflects a broad range of visible colors, while a tinted surface absorbs more of some wavelengths than others. That changes the image’s brightness and color balance, and the effect becomes more apparent in dark scenes, subtle gradients, and skin tones.
Brightness and perceived image quality
Dark paint absorbs more projected light than a white surface, making the picture appear dimmer even when the projector’s output stays unchanged. Mid-tone colors also reduce perceived brightness, while a pale, neutral wall generally preserves more of the image’s light. The difference is most noticeable in a bright room or with a large image, where less reflected light reaches your eyes. As brightness falls, shadow detail and fine texture become harder to distinguish.
Color shifts and contrast loss
Colored paint reflects its own hue into the projected image: a blue wall can make whites look cool, while a beige surface can add a warm cast. Because the wall does not reflect every color evenly, color accuracy declines, especially in scenes with neutral grays, white backgrounds, or carefully graded skin tones. Contrast can also suffer as the surface alters both bright and dark areas, making black levels look less distinct against nearby shadows.
The role of wall texture and finish
Wall texture affects sharpness independently of paint color. A rough or uneven surface scatters projected light, softening fine edges and creating small variations in brightness across the image; visible bumps can distort straight lines in text or graphics. Matte paint usually limits distracting reflections, while satin or glossy finishes can produce hotspots when the projector beam reflects toward your seating position. A smooth matte surface gives the most even result, particularly for detailed images.
| Wall characteristic | Typical image effect | Most visible in |
|---|---|---|
| Dark paint | Lower perceived brightness | Large images and bright rooms |
| Strong wall hue | Color cast and reduced accuracy | Whites, grays, and skin tones |
| Rough texture | Scattered light and softened detail | Text and fine graphics |
| Glossy finish | Reflections or hotspots | Seats in the reflected beam |
When a Colored Wall Can Work
A colored wall is a practical choice when you value convenience over precise color reproduction and the room’s viewing conditions suit the projector. A smooth, matte surface in a modestly sized room is generally more forgiving than textured or glossy paint, which can scatter light or create distracting reflections. For familiar films, presentations, or shared viewing, minor color shifts may be acceptable, especially when the image is large enough to watch comfortably without demanding reference-grade accuracy.
Casual viewing in a dim room
For a relaxed movie night, dim ambient lighting reduces the visual competition between the projected image and the room, so a colored wall can remain usable. A projector with enough brightness for the image size will make shadows and midtones easier to see, while subdued room lighting keeps the picture from looking washed out. This setup suits streaming shows or family videos, where convenience matters more than subtle color detail in a dark scene.
Using a light, neutral-colored wall
Light gray, beige, or off-white paint usually preserves more of the projector’s output than a saturated red, blue, or green wall. A matte finish also reduces glare from lamps and windows, while a smooth surface avoids visible bumps across faces, subtitles, and fine text. If the wall is only slightly tinted, everyday viewing can remain comfortable, though whites may take on a faint cast that is easiest to notice in bright scenes.
Matching expectations to the projector and content
Entry-level projectors and casual content are a reasonable match for a wall that introduces modest color bias, particularly for cartoons, sports, or presentations with bold graphics. More demanding material, such as films with carefully graded skin tones or dark shadow detail, makes color accuracy limits easier to spot. A portable projector used occasionally in a guest room, for instance, can suit a pale painted wall better than a permanent home-theater installation.
- Keep lamps outside the projector’s beam path.
- Clear wall switches and picture hooks from the image area.
- Use a stable mount or level surface to prevent keystone distortion.
Adjusting the Projector for a Colored Wall
Once the projector is in place, tailor its image controls to the room rather than relying on a standard preset. Colored paint absorbs or reflects parts of the projected light, so the same settings will not suit every wall or viewing distance. Make one adjustment at a time, then assess skin tones, white areas, and shadow detail in familiar content. Small, reversible changes make it easier to identify which setting improves the picture without sacrificing detail.
Correcting color with picture settings
Start with the projector’s color temperature and picture mode, selecting a neutral or cinema preset before changing individual controls. If a warm wall gives the image a yellow cast, adjust color temperature toward cooler tones in small increments; a blue or green wall may call for a different balance. Use a grayscale test pattern or a scene with white objects, then fine-tune tint and saturation. Avoid extreme corrections, which can distort skin tones and clip subtle color detail.
Increasing brightness and managing ambient light
Raise the projector’s brightness setting only as far as needed to keep dark scenes legible, since excessive output can wash out highlights and make color less accurate. A brighter lamp or laser mode can help in a lit room, though it may increase fan noise and power use. Close blinds, switch off nearby lamps, and keep light from windows away from the image; even a table lamp beside the wall can reduce perceived contrast.
Positioning and focusing the projector
Place the projector square to the wall and align its lens with the center of the image to avoid keystone distortion. Digital keystone correction reshapes the picture, but heavy correction can soften fine detail, so adjust the projector’s position first. Set the throw distance according to the lens specifications, then focus on small text or a fine grid near the center and corners. Recheck focus after moving the unit, because a slight shift can blur edge detail.
| Adjustment | What to change | What to watch |
|---|---|---|
| Color balance | Temperature, tint, and saturation | White objects and skin tones |
| Brightness | Picture output or lamp mode | Shadow detail, highlights, and fan noise |
| Room light | Blinds and nearby lamps | Image contrast |
| Alignment | Projector position, throw distance, and focus | Keystone distortion and edge sharpness |
Choosing Between a Wall, Special Paint, and a Screen
Your choice of projection surface affects image uniformity, color accuracy, and how permanently the setup changes the room. Standard wall paint is usually the simplest option, while projector screen paint and dedicated screens provide more control over the viewing surface. Each choice involves a different balance of preparation, cost, installation, and flexibility, from keeping an existing wall untouched to mounting a screen with a defined viewing area and consistent image texture.
Standard wall paint
Existing wall paint avoids extra installation, but its sheen, texture, and color become part of the projected image. Matte finishes generally show fewer reflections than satin or semi-gloss paint, while bumps, roller marks, and repairs remain visible on screen. A neutral, smooth wall gives you the most predictable result; textured finishes can soften fine details. Surface imperfections stay visible, so even a patch of uneven paint can interrupt a large projected image.
Projector screen paint
Projector screen paint creates a dedicated projection surface without adding a separate panel. Applied to a properly prepared, smooth area, it can provide a more uniform finish than ordinary wall paint, though the result depends on careful sanding, priming, and even application. Formulas vary in color and reflectivity, so choose one designed for your projector type rather than assuming any specialty coating will improve the image. Preparation determines the finish, and brush or roller marks can remain visible.
Fixed and portable screens
Fixed-frame screens provide a taut, purpose-made surface with a defined border, making them a strong choice when the projection area can remain installed. Portable tripod, pull-down, and folding screens suit temporary setups, though their fabric can ripple or shift if it is not tensioned securely. Screen materials also differ in gain and viewing angle, so specifications matter alongside size. A tensioned surface stays flatter than loose fabric, especially on a wide fixed frame.
- Wall repair is usually needed before painting.
- Screen borders can make image alignment easier.
- Retractable screens keep the projection surface out of sight when stored.
Matching the Setup to Your Room
Room conditions shape how much detail survives from a colored wall, so treat the projector, wall, and seating as one viewing system. Map the screen area around windows, lamps, and furniture before settling on image size; a bright patch behind the picture can make color shifts harder to judge. Your seating position also affects perceived sharpness, since a larger image viewed from nearby makes wall texture and uneven paint more noticeable. Room layout sets the practical limits.
Ambient light and window control
Daylight and room lamps raise the black level of a projected image, making dark scenes look washed out, especially on a wall whose color already absorbs or shifts some light. Close curtains or blinds, then switch off nearby lamps to see how much contrast the room can support. For a permanent setup, note whether sunlight reaches the wall during viewing hours; direct window light can overwhelm shadow detail even when the projector is aimed correctly.
Wall color, viewing size, and seating distance
Choose image size with both wall color and seat position in mind: a darker or more saturated surface can make colors appear less balanced, while a very large picture spreads the projector’s light over more area. Sit at your usual viewing distance and inspect fine text, faces, and shadow detail. If the image looks soft or the wall’s texture is distracting, reduce the projected width before moving furniture; screen width is easier to adjust than wall finish.
Testing the image before committing
Before fixing a mount or painting, project a familiar film scene and a white test pattern onto the intended area. Keep the projector at the planned distance, use the expected image size, and test with curtains and room lights in their usual positions. Look for tinted whites, muddy dark areas, and visible wall irregularities from your seat. A short trial with a temporary setup reveals whether room lighting and wall tone change the picture under everyday conditions.
| Room factor | What to inspect | Setup adjustment |
|---|---|---|
| Window light | Washed-out shadows | Close blinds or curtains |
| Wall color | Tinted whites or muted colors | Test the intended image area |
| Viewing distance | Soft detail or visible texture | Reduce image width |
Final Words
A colored wall can serve as a projection surface, but its hue changes the image: darker colors reduce brightness, while strong tints shift colors away from their intended appearance. You can improve the result by adjusting brightness and color settings, though these changes cannot fully correct an uneven or unsuitable surface. For a more detailed look at wall preparation and paint choices, see Painting The Wall Behind The Projector Screen. A neutral, smooth wall or a dedicated screen gives you more predictable color and contrast.
FAQ
Can you use a projector on a colored wall without buying a screen?
Yes, a projector can work on a colored wall, especially for casual viewing in a dim room. The wall will affect brightness and color accuracy, so results are usually better on a smooth, light, neutral surface and may not match a proper screen.
How much does it cost to make a colored wall better for a projector?
The cost can range from nothing to the price of special projection paint or a screen, depending on what you already own and how much improvement you want. Testing the projector on the wall first can help you decide whether a surface upgrade is worth the expense.
How long does it take to adjust a projector for a colored wall?
Basic adjustments can take a few minutes, while finding the best color, brightness, focus, and position may take longer. The time depends on the projector controls, room lighting, and whether you can test the image from your usual seating position.
Can a colored wall damage a projector or cause eye problems?
A colored wall does not damage a projector, but it can make the projected image look dimmer or less accurate. There is no special eye risk from the wall itself; avoid staring into the projector lens, and adjust brightness and room lighting for comfortable viewing.
What is the best alternative if my wall makes the picture look wrong?
A smooth, light-colored wall, projection paint, or a dedicated screen can improve the image, with a screen usually providing the most controlled surface. The right choice depends on your budget, available space, room lighting, and whether you need a permanent or portable setup.