
A video call that freezes in one room while working smoothly in another often points to a WiFi dead zone, not a problem with your internet plan. You can locate weak coverage using a smartphone, a laptop, and ordinary tasks such as loading a webpage or streaming audio. Signal strength varies by location, especially behind thick walls or far from your router.
Key Takeaways:
- Use a smartphone or laptop to test WiFi where you notice slow loading, dropped calls, or buffering, then repeat the same task near the router as a baseline.
- Walk through each room while watching the device’s WiFi signal indicator and recording the location and symptoms, including whether the device switches networks or disconnects.
- Retest weak spots after moving the router or changing its position, and note nearby obstacles such as thick walls, metal cabinets, and appliances.
Understand WiFi Dead Zones
WiFi coverage depends on how radio signals travel from your router to each device, with walls, floors, metal surfaces, and distance reducing signal strength. A dead zone is an area where that signal is too weak or unreliable for a usable connection, rather than a separate fault in your device. The boundary is rarely sharp: you may move from stable browsing to repeated buffering over just a few steps, especially behind dense building materials.
Signs of a weak or missing WiFi signal
In a weak-signal area, your phone or laptop may remain connected while pages load slowly, video buffers, or calls break up. A missing-signal spot often appears as a WiFi icon that drops to one bar or disappears, followed by frequent disconnections. Uneven performance by location is a telling pattern: a video call works at your desk but freezes in the next room, while the same device and app behave normally near the router.
Dead zones versus internet service problems
Dead zones affect the wireless link between your router and a device, while an internet service problem affects the connection reaching your home. Location-specific trouble points toward WiFi coverage: devices struggle in one room but work normally closer to the router. By contrast, an outage or provider slowdown typically affects devices across multiple rooms, including a computer connected directly to the router with an Ethernet cable. A provider fault does not usually follow you from one room to another.
- Concrete walls and masonry can attenuate WiFi signals more than drywall.
- Metal filing cabinets can reflect or block radio waves.
- Microwave ovens can interfere with some 2.4 GHz WiFi connections while operating.
Find Dead Zones Without Special Equipment
Use the devices you already carry to trace coverage from room to room: a phone, laptop, router, and a simple floor plan are enough. Keep the test conditions consistent by staying on the same WiFi network and noting where you stand, such as beside a bedroom doorway or at the far end of a hallway. A repeatable route and ordinary online tasks give you practical checkpoints without dedicated measuring hardware.
Check WiFi signal strength on a phone or laptop
Open your device’s WiFi settings and look at the signal indicator while standing in each room. On Windows, the WiFi icon in the taskbar shows connection strength; on macOS, hold Option while selecting the WiFi menu to view signal details. Android and iPhone settings typically show signal bars rather than a numeric reading. Record the location and number of visible bars on a simple room sketch, keeping the device at the same height.
Walk through rooms and test common online tasks
Carry your phone or laptop along a fixed route, pausing in places where you commonly stream, work, or make calls. Load a webpage, play a short video, or join a test call, then note where loading stalls, video quality drops, or audio cuts out. Keep the same app and task at each stop, and mark spots such as desk corners and stair landings on your floor plan.
Use router lights and built-in network tools
Check the router’s status lights before and during your walk. A steady WiFi light generally indicates that the wireless network is active, while an internet or WAN light reflects the router’s connection to your provider; consult the router label or manual for its specific patterns. On a laptop, built-in network settings show the connected network and link status. Note any change in router light behavior alongside the room where it occurs.
| Tool | What to note | Where to use it |
|---|---|---|
| Phone WiFi settings | Signal bars | Room entrances and corners |
| Laptop WiFi menu | Signal or connection status | Desk and work areas |
| Browser or video app | Loading, playback, or call interruptions | Common-use spots |
| Router status lights | Wireless and internet indicators | Beside the router |
Map and Record Your Findings
Consistent notes turn scattered WiFi checks into a usable record of where performance changes. Give each test a location label, note the conditions, and use the same phone or laptop when practical. Record signal bars alongside measured download and upload speeds, since bars alone do not show how well a connection performs. A simple log lets you distinguish a repeatable weak spot from a one-time slowdown, such as a video call competing for bandwidth.
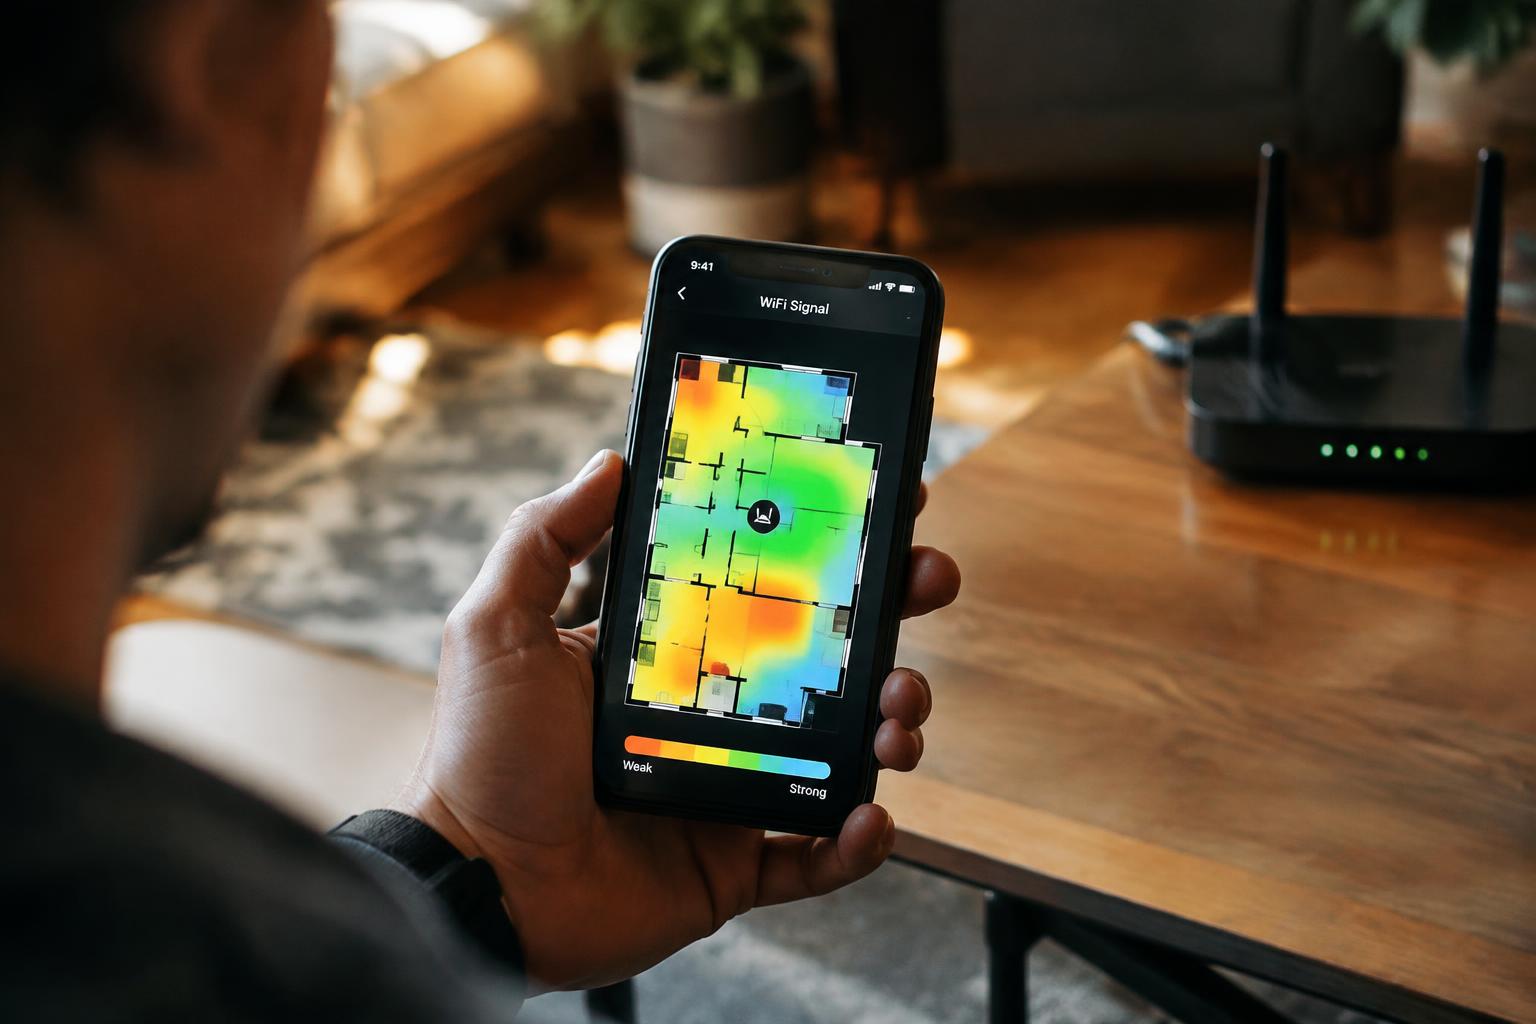
Create a simple room-by-room WiFi map
Sketch your floor plan or list rooms in the order you test them, then mark each spot with a short label such as “kitchen, counter” or “bedroom, doorway.” Keep the router’s location visible on the sketch and use the same position within each room on later visits. Add a signal-quality note, such as strong, fair, or weak, and mark the exact corner or hallway where a connection drops.
Note device, connection, and speed-test results
Record the device model, whether it is connected to the 2.4 GHz or 5 GHz band, and the network name if you use more than one. Run the same speed-test app at each marked location, recording download speed, upload speed, and latency when shown. Include the test time and whether the result came from WiFi or mobile data, since an automatic network switch can make a speed reading misleading.
Repeat tests at different times
Test the same locations during more than one period, such as a quiet morning and an evening when household devices are active. Keep the device, test app, room position, and connection band consistent so differences are easier to interpret. Note unusual activity, including a large download or a streaming session, rather than treating that result as typical. A time-stamped log reveals whether a weak reading persists or appears only during busy network periods.
- Use one label format for every room and test point.
- Keep the floor-plan sketch oriented the same way on each visit.
- Record whether doors were open or closed during the test.
Identify Factors Behind Weak Coverage
A weak signal in one room often reflects several physical and electronic conditions rather than a single fault. Your phone’s signal bars show the connection at that location, while a speed test adds evidence about performance; neither identifies the cause on its own. Track where the signal drops, then relate those spots to distance, materials, and interference. A bedroom behind a concrete wall presents a different pattern from a patio affected by a neighboring network.
Distance from the router and building materials
As you move farther from the router, the WiFi signal weakens, especially across several rooms or floors. Walls and floors add further loss: concrete, brick, and metal generally block more signal than drywall or wood, while foil-backed insulation can be particularly obstructive. A phone that connects well in the hallway but struggles in a basement behind a masonry wall is showing the combined effect of distance and material, not simply a device fault.
Household electronics and neighboring networks
Microwave ovens, cordless phones, Bluetooth devices, and some baby monitors can add radio-frequency interference, particularly on the crowded 2.4 GHz band. Nearby routers also compete for airtime when their networks use overlapping channels. If your connection falters mainly while a microwave runs, interference is a reasonable suspect; if performance varies in a dense apartment building, neighboring WiFi traffic may contribute. The pattern and timing distinguish these sources from a signal blocked by a wall.
Router position, height, and antenna direction
A router tucked inside a cabinet, placed behind a television, or set on the floor sends much of its signal through nearby obstructions. Its position relative to the rooms you use also matters: a router at one end of a long home leaves more distance to cover on the opposite side. External antennas shape coverage according to their orientation, while internal antennas follow the device’s design. Note router location and antenna angle alongside each weak spot.
| Factor | Typical clue | Relevant detail |
|---|---|---|
| Distance | Signal fades farther from the router | Rooms across floors or at the far end of a home |
| Building materials | Drop occurs behind a particular wall | Concrete, brick, metal, or foil-backed insulation |
| Interference | Connection varies with device use or nearby traffic | Microwaves, Bluetooth devices, overlapping WiFi channels |
| Router placement | Weak coverage clusters away from or behind the router | Cabinets, floor-level placement, antenna orientation |
Improve Coverage and Retest
Make one adjustment at a time so you can tell which change improves reception in the affected rooms. Begin with router placement, then address nearby sources of interference or choose a more suitable band. Use a free signal-strength app or your device’s built-in WiFi details to record readings at the same locations before and after each change. For tool options, see Looking for Free Wi-Fi Signal Strength Tool.
Reposition the router and adjust its antennas
Place the router in an open, central location, elevated on a shelf and away from cabinets, floors, and dense walls. Keep it clear of metal objects and large appliances, which can obstruct or reflect radio signals. If the router has external antennas, angle one vertically and another horizontally to serve devices with different antenna orientations. Avoid hiding the unit behind a television, since its casing and nearby electronics can weaken coverage in the next room.
Reduce interference and connect to the best WiFi band
Nearby cordless phones, microwave ovens, Bluetooth devices, and neighboring routers can add interference, especially on the 2.4 GHz band. Move the router away from active electronics, and use its settings to select a less crowded WiFi channel if automatic selection performs poorly. Connect distant devices to 2.4 GHz for broader reach; use 5 GHz or 6 GHz for faster service closer to the router, where walls and distance have less effect.
Retest affected rooms after each change
Return to the same spots where you recorded weak reception, keeping the phone or laptop in the same position and orientation. Use the same signal-strength app or built-in WiFi screen, then run a brief speed test to distinguish stronger signal from faster internet performance. Record the readings after each adjustment, rather than changing several settings at once. A clear improvement in the far bedroom, for instance, should appear in both its signal reading and connection stability.
- Keep router firmware settings unchanged during placement tests.
- Test with the same device throughout each comparison.
- Pause large downloads before running a speed test.
Tips for Reliable DIY Testing
Reliable home checks depend on controlling the conditions around each reading, since normal changes in device position, network activity, or testing method can make results misleading. Keep notes on the testing conditions, including the room, time, device, and app or built-in connection indicator you use. Use the same WiFi network throughout, and avoid switching between bands during a test. A quiet, repeatable routine makes a weak reading easier to distinguish from a temporary fluctuation.
| Testing detail | Keep consistent | Record |
|---|---|---|
| Device | Use the same phone or laptop | Device model |
| Method | Use the same signal indicator or app | Reading type |
| Conditions | Keep network activity similar | Time and active downloads |
Keep the test device and method consistent
Use the same phone or laptop for every reading because antennas and WiFi drivers differ between devices. Keep the device in the same orientation and hold it at a consistent height, rather than comparing a phone in your hand with a laptop on a desk. Choose one measurement method, such as the operating system’s signal indicator or the same WiFi app, and record its units. Matching the device and method makes each location’s readings directly comparable.
Check multiple locations, not just room centers
Test along the routes you actually use, including doorways, desk positions, hall corners, and the far side of large furniture. A room center can show a usable signal while a workstation beside a masonry wall has a weak connection. At each spot, pause in the same place and orientation before recording the reading. Include practical use points, such as the chair where you take video calls or the counter where a smart display sits.
Compare results before and after adjustments
Before moving a router or changing an access point setting, record readings at fixed test spots and note the network configuration. Repeat the same route afterward with the same device, method, and orientation, while keeping downloads or video streams in the home network as similar as possible. A stronger signal reading does not always mean faster service, so record a speed test separately if you use one. Keep a dated before-and-after log with each location’s signal and speed results.
Conclusion
Finding WiFi dead zones does not require a dedicated analyzer: your phone, a laptop, and a repeatable walking test reveal where signal and connection quality drop. Record readings in the rooms and outdoor areas you use, then relate weak spots to distance, walls, appliances, or router placement. After moving the router or adjusting its antennas, repeat the same route under similar conditions. A simple floor plan marked with signal readings gives you a practical record of coverage changes.
FAQ
Can I find WiFi dead zones without buying a WiFi analyzer?
Yes, a phone or laptop can help you find WiFi dead zones by checking signal strength and testing ordinary online tasks in different spots. Results are most useful when you use the same device and test method throughout, since device hardware and background network activity can affect readings.
How long does it take to check my home for WiFi dead zones?
A basic check can take a few minutes per room, while mapping a larger home or repeating tests at different times takes longer. Allow extra time if you are recording signal readings or comparing coverage before and after moving the router.
Can testing WiFi signal strength damage my router or devices?
No, checking signal strength and using ordinary internet tasks will not damage your router or devices. Avoid changing unfamiliar router settings just to test coverage, since incorrect changes could interrupt the connection or make the network harder to access.
Why does my WiFi signal look strong but videos still buffer?
A strong WiFi signal does not guarantee fast internet, because buffering can also result from a slow internet connection, network congestion, or problems with the streaming service. Compare results on another device and test a wired connection, if available, to help distinguish a WiFi coverage issue from an internet service problem.
What should I try if moving my router does not fix a dead zone?
If repositioning the router does not improve coverage, try reducing nearby interference and checking whether another WiFi band provides a more reliable connection. For persistent gaps, a WiFi extender or mesh system may help, but the best option depends on your home’s layout and where the router can be placed.